
Which Diablo 4 Endgame Activities Are Actually Worth Your Time?

Reaching level 50 in Diablo 4 is just the beginning of your journey. The endgame is where the true challenge and reward lie, but with so many activities available-from Nightmare Dungeons to Helltides and PvP zones-it’s easy to waste hours on content that offers little value. Not all endgame activities are created equal; some are essential for power progression, while others are best left for casual fun. Below, we break down the most worthwhile endgame activities, helping you focus your time on what truly matters. This is an excellent guide to help you more easily acquire more Diablo 4 Items, gold, and other rewards in the game.

1. Nightmare Dungeons: The Core of Gear and Power Progression

If there’s one endgame activity you shouldn’t skip, it’s Nightmare Dungeons. Unlocked after obtaining your first Nightmare Sigil (earned through Whispers of the Dead or world drops), these modified dungeons are the backbone of Diablo 4’s endgame progression. They feature unique affixes-both positive and negative-that alter difficulty and rewards, keeping each run feeling fresh.

Nightmare Dungeons are the best source of Obducite, a critical material for masterworking gear to maximize its potential. On Torment difficulty, they guarantee legendary or unique item drops, making them essential for farming high-tier gear. Additionally, they’re a great way to earn experience for your Paragon Board, which is key to customizing your build and unlocking powerful passive bonuses.

To maximize efficiency, focus on Sigils with positive affixes like “Ancestor’s Favor” (10% more experience) or “Horadric Strongroom” (guaranteed chests) and avoid overly punishing negative affixes.组队 with friends can also speed up runs, thanks to the game’s team synergy and shared progress boosts.

2. Helltides: High-Density Loot and Unique Materials

Helltides are limited-time world events that spawn every hour and last 55 minutes, making them a must-do for players chasing rare materials and legendary gear. Unlocked at World Tier 3 (Nightmare difficulty), these events increase enemy density and difficulty, but the rewards are well worth the risk.

The primary currency in Helltides is Aberrant Cinders, dropped by elite mobs, bosses, and interactable Tortured Souls. These cinders can be used to open Tortured Gift Chests, which come in armor, weapon, jewelry, and mystery variants-the latter being the most valuable, costing 250 cinders and offering the highest chance of legendary and unique items.

Helltides are also the only place to farm Fiend Roses, a rare herb needed for high-tier crafting and stat rerolling at the Occultist. Additionally, you can find Living Steel, a material required to summon Grigoire, the Galvanic Saint-one of the season’s endgame bosses. For optimal farming, focus on zones like Kehjistan, which has high elite density and Living Steel chest hotspots.

3. Whispers of the Dead: Consistent, Low-Effort Rewards

Whispers of the Dead (often called Whispering Tree quests) are perfect for players who want consistent, low-effort rewards without the intensity of Nightmare Dungeons or Helltides. Unlocked after completing Act V, these daily tasks range from clearing cellars to defeating specific monsters, each granting 1-5 points of “Baleful Blessings”.

Once you collect 10 points, you can return to the Whispering Tree to choose one of three chests, which contain gear, gems, crafting materials, or Nightmare Sigils. The beauty of Whispers is their flexibility-you can complete them while doing other activities, like Helltides or world events, making them a great way to earn rewards passively.

Recent updates have made Whispers even more efficient by allowing players to submit tasks directly from towns, eliminating the need to travel back to the Whispering Tree repeatedly. For new endgame players, Whispers are an excellent way to build up a foundational gear set before tackling harder content.

4. Greater Rifts: Endgame Challenge for Hardcore Players

For players seeking the ultimate challenge, Greater Rifts are the pinnacle of Diablo 4’s endgame. Unlocked using Greater Rift Keystones (dropped by Rift Guardians in normal Nephalem Rifts), these timed dungeons require you to clear waves of monsters and defeat a final boss within 10 minutes to earn maximum rewards.

Greater Rifts offer unique rewards, including Stygian Stones and masterworking materials, and their difficulty scales infinitely-making them a test of your build’s power and your skill as a player. Higher tiers yield better loot, but they also require optimized builds and careful planning.

While Greater Rifts aren’t essential for basic progression, they’re perfect for hardcore players looking to push their limits. They also pair well with the game’s build tier lists, as S-tier and A-tier builds (like the HOTA Barbarian or Pulverize Druid) are best suited for clearing high-level rifts efficiently.

Activities to Avoid (or Save for Casual Play)

Not all endgame activities are worth your time. For example, PvP in the Fields of Hatred is fun for players seeking chaos, but it offers no core power progression-rewards are limited to cosmetic items like mounts and skins. Unless you enjoy player vs. player combat, you’re better off focusing on PvE activities.

Similarly, low-difficulty world events (like regular dungeon runs or random monster hunts) offer minimal rewards once you reach World Tier 4. These are best saved for casual sessions when you don’t want to grind for specific loot or cheap D4 materials.

Final Thoughts: Prioritize Your Goals

The best endgame activities depend on your goals. If you want to maximize your power, focus on Nightmare Dungeons and Helltides. If you prefer low-effort, consistent rewards, stick to Whispers of the Dead. For hardcore challenge, dive into Greater Rifts.

Diablo 4’s endgame is designed to be flexible, so don’t feel forced to grind one activity exclusively. Mix things up to avoid burnout, but always prioritize content that aligns with your goals-whether that’s farming the perfect legendary item, optimizing your Paragon Board, or simply having fun.

With these priorities in mind, you’ll make the most of your time in Sanctuary’s endgame, turning every hour of grinding into tangible progress.

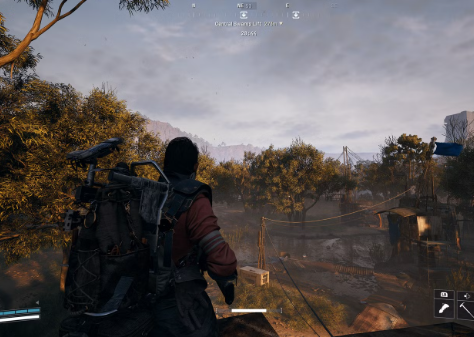
How Players Can Acquire Comet Igniter in ARC Raiders

The Shrouded Sky update introduced intense new weather systems and dangerous ARC variants to ARC Raiders, including the explosive and fast-moving Comet ARC. Alongside the Hurricane weather condition, players gained access to a powerful new special resource: the Comet Igniter.

Comet Igniter is a special resource introduced with the Shrouded Sky update. It primarily serves as a key component for the Weather Machine Project, one of the major crafting and progression additions tied to dynamic weather systems.

Unlike common crafting materials found in containers or dismantled gear, Comet Igniter only drops from a specific enemy type: the Comet ARC.

That means farming this resource requires hunting down a dangerous and mobile target in active combat zones.

Where to Find Comet Igniter

You can obtain Comet Igniter by defeating a Comet ARC, a new enemy that appears during Hurricane weather conditions.

When Do Comets Spawn?

Comets are most commonly found during:

Hurricane weather events

Outdoor areas across multiple maps

However, they are not exclusive to Hurricanes. They can appear on any map that features open outdoor terrain.

If you’re actively hunting Comet Igniter, prioritize deployments when Hurricanes are active, as spawn frequency increases.

How to Spot a Comet ARC

The Comet ARC is:

Small
Spherical
Fast-moving
Extremely aggressive

Unlike many ground-based ARCs that patrol structures, Comets spawn outdoors in open spaces.

Why Comets Are Dangerous

Comets function similarly to Pops ARCs, but they are far more durable and mobile.

Here’s how they behave:

They quickly close the distance once they detect you.

A central line on their body turns red when alerted.

As they approach detonation range, the red turns orange

They explode upon reaching you

If you’re caught off guard at close range, the explosion can eliminate you instantly – especially if you’re already engaged with other threats or carrying valuable ARC Raiders Items.

Best Weapons to Defeat Comets

Comets have heavy armor protection, similar to ARC Surveyors. You’ll need high-damage weapons to break through efficiently.

Recommended weapons include:

Bettina (serious damage precision rifle)

Anvil (solid mid-to-long-range option)

II Toro (high risk due to shotgun range)

Hullcracker (strong armor penetration)

While the II Toro can work, engaging at close range is risky. Ideally, you want to eliminate the Comet before it closes distance.

Combat Tips

Engage from long range whenever possible.

Maintain high ground for better visibility.

Avoid tight spaces – Comets thrive in confined areas.

Clear nearby ARCs before focusing on the Comet.

Using strong defensive ARC Raiders Items, such as mobility boosts or temporary shields, can improve survival during unexpected encounters.

How to Farm Comet Igniter Efficiently

Because Comet Igniter is not a guaranteed drop, farming requires repetition and smart planning.

1.Deploy During Hurricanes

    Hurricanes increase ARC activity and improve spawn opportunities.

    2.Rotate Through Open Areas

      Move between known spawn zones quickly rather than campingin one spot.

      3.Prioritize Extraction After Drop

        If you secure a Comet Igniter, consider extracting immediately.

        4.Use Safe Pockets If Available

          If your loadout allows, stash the Comet Igniter securely.
          Remember, extraction shooters reward survival more than aggression.

          What Is Comet Igniter Used For?

          Comet Igniter is primarily required for the Weather Machine Project, a crafting initiative introduced with Shrouded Sky.

          This ties directly into higher-tier crafting systems, which also depend on:

          Rare components
          Blueprint unlocks
          Advanced ARC Raiders Items

          Players looking to accelerate crafting often seek to buy ARC Raiders BluePrints through player trading systems to skip early blueprint unlock phases. However, certain materials like Comet Igniter still require active farming.

          In short, you can buy ARC Raiders BluePrints to optimize gear paths – but you can’t skip hunting Comets if you want Weather Machine progress.

          Risk vs. Reward: Is Comet Farming Worth It?

          Absolutely – if done strategically.

          Pros:

          Essential for Weather Machine crafting
          Valuable trading resource
          Found in high-visibility open areas

          Cons:

          High-risk engagement
          Explosive kill potential
          Not a guaranteed drop

          Efficient farming requires balancing combat readiness with map awareness.

          Whether you’re upgrading your Weather Machine, crafting advanced ARC Raiders Items, or choosing to buy ARC RaidersBlueprintss to fast-track progression, mastering Comet encounters is an important part of endgame efficiency.

          ARC Raiders Industrial Charger Farming Guide

          Season 3 of ARC Raiders has officially arrived, bringing a brand-new Expedition Project, tougher enemy encounters, and a full progression reset. As with every new season, players start with empty inventories, limited crafting options, and intense competition for key materials.

          One of the most important early-season resources is the Industrial Charger, a critical crafting component required for several Expedition Project steps. Because the item is rare and cannot be obtained through crafting or vendors, many players struggle to gather enough for progression.

          This guide explains where to find Industrial Chargers efficiently, the best farming routes to follow, and how to safely extract while protecting your valuable ARC Raiders Items.

          What Is the Industrial Charger in ARC Raiders?

          The Industrial Charger is a specialized crafting material tied to Industrial-type loot zones. It plays an important role in completing Season 3 Expedition Project objectives and unlocking deeper progression paths.

          Unlike many materials in the game, Industrial Chargers have strict acquisition rules:

          ·They cannot be crafted

          ·They cannot be purchased

          ·They cannot be recycled from other materials

          ·They must be looted during active raids

          Because of these limitations, efficient farming routes become extremely important. Players who simply wander through the map will often waste time and risk unnecessary combat encounters without finding the materials they need.

          Instead, targeted farming in the correct Points of Interest (POIs) dramatically increases your success rate.

          How to Identify the Best Industrial Farming Areas

          Industrial Chargers primarily appear in Industrial material zones, which can be identified in two key ways.

          Map Indicators

          The easiest way to find these areas is by checking the factory icon above the POI name on the map. This symbol indicates that the location has a higher chance of spawning Industrial-type resources.

          Environmental Clues

          Even without checking the map, Industrial areas usually contain recognizable environmental features such as:

          ·Shipping containers

          ·Tool lockers

          ·Machinery rooms

          ·Breachable equipment panels

          ·Metal shelving units

          These elements typically signal that the POI contains Industrial loot pools.

          However, not every Industrial location has the same spawn efficiency. Some zones consistently provide better farming opportunities than others.

          Best Locations to Find Industrial Chargers

          1. Dam Battlegrounds – Water Treatment (Best Farming Location)

          The Water Treatment facility in Dam Battlegrounds is widely considered the most efficient place to farm Industrial Chargers early in Season 3.

          While it is smaller than many other POIs, its compact layout allows players to clear the entire area quickly while checking a large number of loot containers.

          Why Water Treatment Is So Efficient

          ·High locker density

          ·Concentrated loot spawns

          ·Minimal wasted travel space

          ·Fast raid clear times

          Priority Loot Spot: East Red Locker Room

          The most important area inside Water Treatment is the red locker room on the east side.

          This room frequently produces:

          ·1-2 Industrial Chargers per run

          ·Occasional 3+ Charger spawns

          ·Rare lucky runs with 4-5 Chargers

          Because of the spawn density, players who start near this POI can sometimes complete their entire Expedition requirement in a single raid.

          Check the West Room Before Leaving

          Before extracting, also clear the west-side room, which contains:

          ·Desks

          ·Metal boxes

          ·Breachable containers

          While slightly less consistent than the locker room, it still provides solid Industrial loot opportunities.

          2. Spaceport – Vehicle Maintenance

          Another excellent farming location is the Vehicle Maintenance building at Spaceport, located south of the Launch Tower.

          This three-story structure contains a large number of Industrial containers and is one of the most resource-rich buildings in the game.

          High Priority Loot Targets

          Start by checking:

          ·Open-sided shipping containers

          ·Green metal shelving units inside containers

          ·Tool lockers

          ·Breachable crates

          The green shelf containers on the first floor are especially valuable, as they have a surprisingly high chance to spawn Industrial Chargers.

          Each level of the building also includes additional loot opportunities, such as:

          ·Toolboxes

          ·Machinery panels

          ·Breakable equipment storage

          Because of its vertical layout, clearing the entire structure thoroughly can produce excellent results.

          3. Spaceport – Container Storage

          If you’re already farming Spaceport, rotate next to Container Storage, another Industrial-heavy POI nearby.

          This location contains:

          ·Large numbers of open shipping containers

          ·Green shelving units

          ·Upper-floor breachable rooms

          High-Risk, High-Reward Area

          The top-floor breachable room is one of the best Industrial loot spots in the region.

          However, it comes with several risks:

          ·It is often looted early in raids

          ·PvP activity is extremely common

          ·Squads frequently contest the location

          Solo players may want to focus on quickly clearing first-floor containers and leaving before engaging in extended fights.

          4. Stella Montis – Loading Bay

          The Loading Bay at Stella Montis is often overlooked but remains a strong Industrial Charger farming location.

          Most players focus on the nearby Assembly or Medical Research zones, which makes Loading Bay slightly less contested.

          Why Loading Bay Works

          ·Multiple floors filled with shipping containers

          ·Consistent Industrial container spawns

          ·Lower player traffic compared to major POIs

          Across its three main levels, players will find several container clusters similar to those at Spaceport but often with less PvP pressure.

          If you spawn near Stella Montis and want a safer farming route, Loading Bay is a great option.

          Farming Strategy Tips for Industrial Chargers

          Because Industrial Chargers cannot be crafted or purchased, efficient gameplay strategies are critical.

          Prioritize Spawn Location

          Your initial spawn should determine your farming route:

          ·Spawn near Water Treatment → Rush it immediately

          ·Spawn near Spaceport → Start with Vehicle Maintenance

          ·Spawn near Stella Montis → Clear Loading Bay first

          Quick early looting significantly increases your success rate.

          Bring Breaching Charges

          Many Industrial Chargers spawn inside breachable containers.

          Skipping these containers dramatically lowers your chances of finding Chargers, so always bring breaching tools when possible.

          Players planning long-term progression sometimes optimize their crafting paths early in the season-or even choose to buy ARC Raiders BluePrints to unlock advanced equipment faster.

          Travel With Mid-Tier Gear

          When performing targeted loot runs:

          ·Avoid bringing top-tier equipment

          ·Expect PvP at popular POIs

          ·Focus on quick loot and extraction

          This approach helps protect your most valuable ARC Raiders Items from unnecessary losses.

          Extract Once You Find Enough

          Industrial Chargers are not extremely rare, but they are rare enough that losing them during extraction can be frustrating.

          Once you find what you need:

          ·Head toward the extraction immediately

          ·Avoid additional combat

          ·Secure your progress

          Greed is often the biggest reason players fail Expedition objectives.

          Why Industrial Chargers Are a Seasonal Bottleneck

          Seasonal resets in ARC Raiders are designed to reshape the in-game economy and encourage exploration.

          Industrial Chargers play a key role in this system by:

          ·Slowing early progression

          ·Encouraging map exploration

          ·Driving player encounters in Industrial POIs

          ·Creating early-season resource competition

          Because there is no crafting alternative, every player must actively raid to obtain them.

          Final Thoughts

          Industrial Chargers are one of the most important early-season materials in ARC Raiders Season 3. Without them, players cannot progress through several Expedition Project stages.

          Fortunately, by focusing on efficient farming routes-such as Water Treatment, Vehicle Maintenance, Container Storage, and Stella Montis Loading Bay-you can collect the necessary Chargers in just a few successful raids.

          Smart route planning, careful extraction timing, and protecting your most valuable ARC Raiders Items will allow you to complete your Expedition objectives quickly and move ahead of the competition in Season 3.